Is your beloved Holdie House looking a little worse for wear? Is it sick of the scribbles and in need of a little loving? Fear not! We joined forces with Caddie from the Heart Cart, to bring you the swiftest home-reno the world has ever seen! Enlist the help of your creative kiddos to transform your Holdie abode with a lick of paint and some funky vintage wallpaper!
~-
 01You will Need
1. Paint - We used sample pots of house paint, available from most hardware stores. House paint has great coverage, which means you only need to apply one coat (phew!) but you can also you any thick acrylic paint.
2. Brushes - Flat brushes are best for painting the Holdie interior and exterior walls and fine tip brushes are helpful for getting into those tiny edges and corners.
3. A cup with warm water to rinse your brushes between colours. -
 02You will need
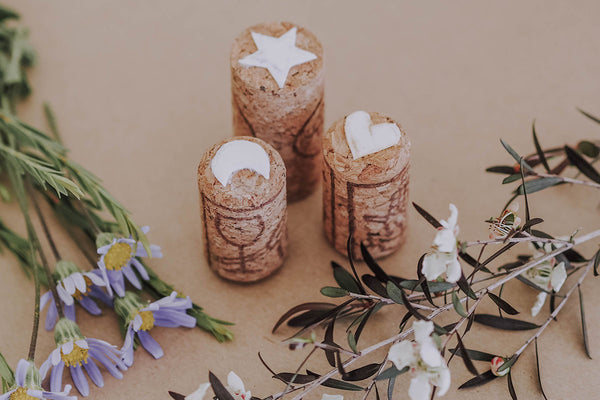
4. Stamps - We used some flowers from the garden and also created some stamps of our own, using old cork screw stamps. You can use anything from leaves to potatoes to create fun shapes!
5. Wallpaper and stencil printouts - Download Wallpaper Here
6. Craft glue, crayons, coloured pencils or textas.
7. Some baby wipes or a washcloth for wiping up spills (and little hands). -
 03Get Ready!
Prepare your craft area and lay down a protective cover (we used a roll of brown paper). Get your warm water ready, gather your brushes and stamping objects, open your paint colours and make sure to wear some craft-friendly clothing! -
 04Interior
Start by painting the interior of your house, rinsing your brushes between each colours. -
 05Stencil
Cut out the printable stencils. Each stencil is labelled with its correlating room. -
 06Wallpaper
Trace the stencil onto our custom Olli Ella wallpaper then cut around the outline. -
 07Colour
You can also your crayons or coloured pencils to colour in the sheet of blank wallpaper. -
 08Paste
Paste the wallpaper cutout onto the chosen wall to add a touch of retro charm. -
 09 Dip
Dip your DIY stamps into the paint so that they are evenly coated. Don't worry too much about getting your hands messy - we hear that finger painting is trending right now! -
 10 Stamp
Once the walls are dry, press the stamp onto the walls and create a pattern. -
 11 Exterior
Once the interior is complete, you can close your house while it dries and move on to painting the exterior with a nice flat brush. -
 12 Tricky Bits
Paint around the tricky areas using a small pointy ended brush. Pay careful attention to the hinges, closing the clasp and handle. Keep your wash cloth on hand for those inevitable spills and smudges. -
 13 Done!
Voila! The transformation is complete!

 Welcome to Olli Ella!


